

0. How to use this manual
0.1 Before starting construction, please read the instructions from start to finish. This reduces the likelihood of mistakes and “misunderstandings”.
0.2 It is recommended to watch the main informative videos on Sfera’s YouTube channel (playlist “Building the Dome”).
0.3 If you are unsure, please stop and contact your Sferos UAB representative (contact details at the end of this document).
1. Kit: transport and storage
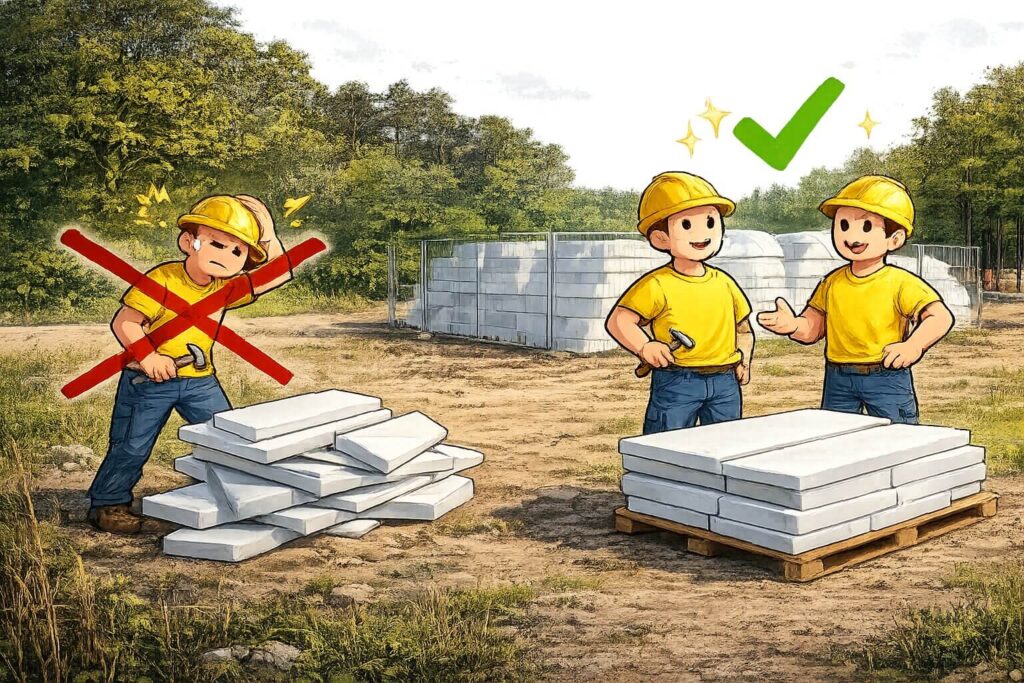
1.1 Loading and unloading – manual. The set is transported in individual parts without pallets. The polystyrene elements may be damaged by lifting equipment.

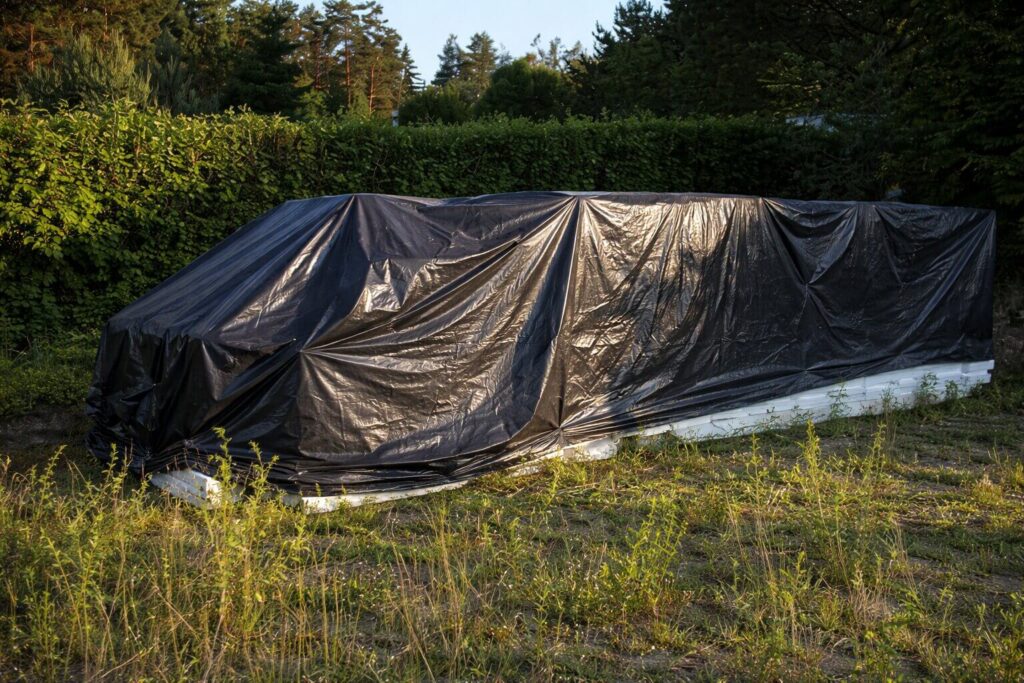
1.2 Protect the kit if it is not used immediately. Protect it from damage by third parties, direct sunlight, precipitation and other factors that may reduce quality.
1.3 It is recommended to work in a team of at least 2 people.
2. Site preparation and foundation
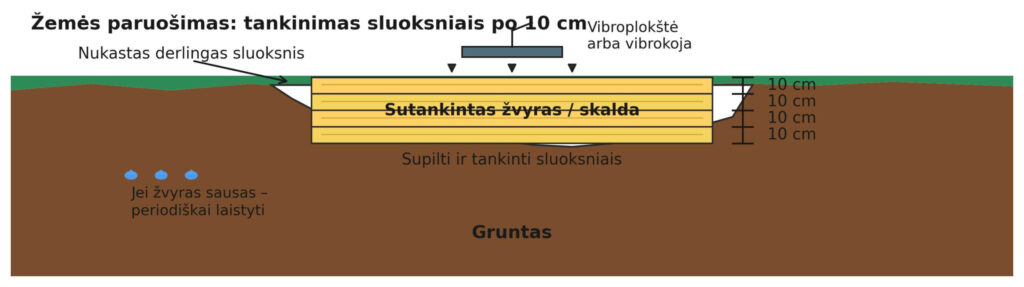
2.1 Remove the topsoil, level the terrain, add a layer of gravel / crushed stone and compact with a vibratory plate or a vibratory plate.
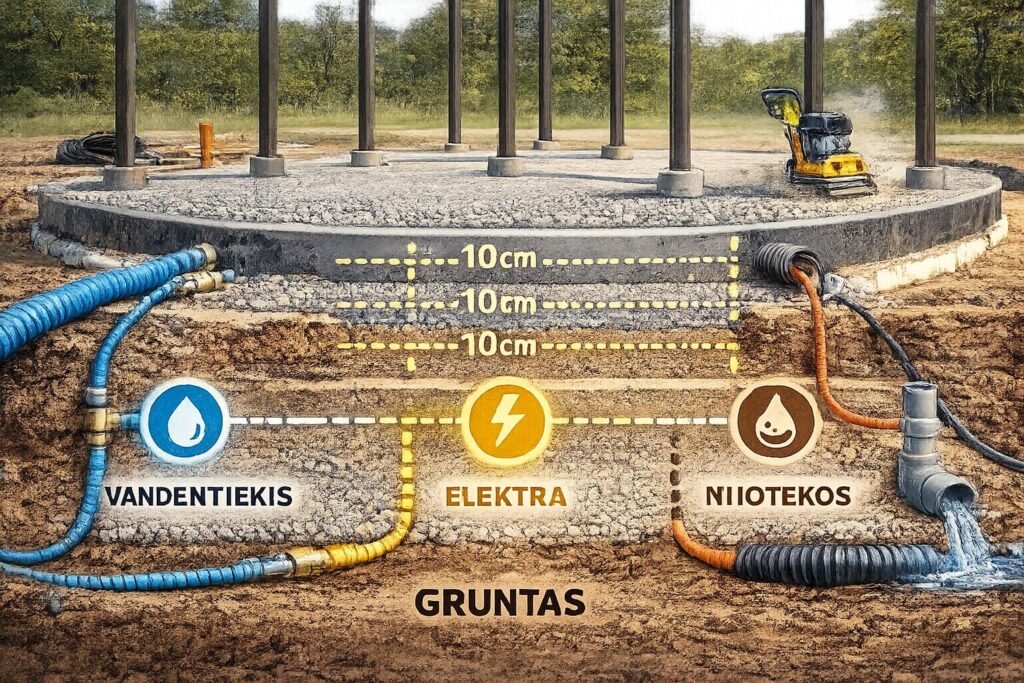
2.2 Compaction layers up to 10 cm. If the gravel is dry, periodically moisten with water (dry gravel is more difficult to compact well).
2.3 Assess the terrain, soil and depth to groundwater. Prepare a level base for the construction of the dome.
2.4 If the purpose is “Residential”, make all layers according to the design (drainage, gravel and rubble cushion, foundations, etc.).
2.5 It is advisable to install communications services, such as water and electricity mains, and sewage pipes, prior to the start of construction.
2.6 More on the installation of a planar foundation: YouTube video “Installing the foundation and floor of a dome house, installation”.
3. "Flyer" and centre marking
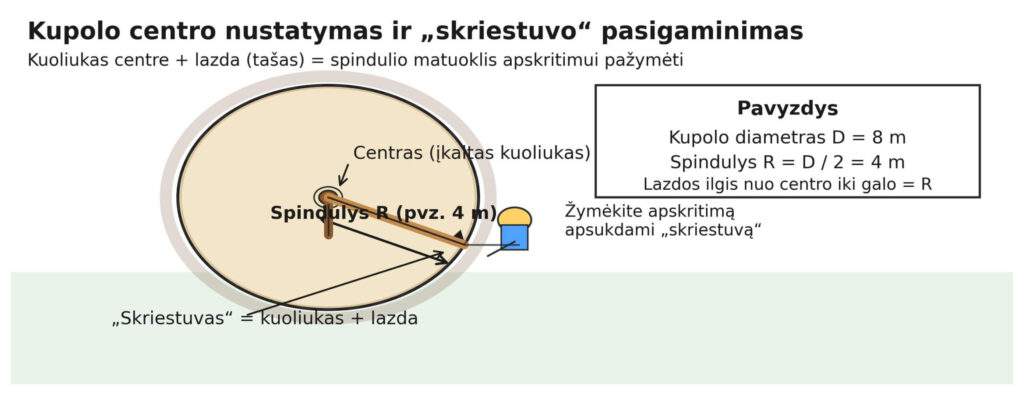
3.1 Choose the centre of the future dome. Hammer the stake.
3.2 Attach (nailed or screwed with a wooden dowel) to the top of the pole (to allow for rotation in all directions) the length indicated on the drawings (Drawings provided by the dome kit manufacture). This is the “flyer”.
3.3 Trace the outline of the dome with a pencil.
4. Marking and preparation of parts
4.1 The parts of the kit have numbers (0, 1, 2, 3, etc.). The elements of the residual formwork are usually marked “00”.
4.2 The first ring is usually made up of “0” (sometimes “1” depending on the order). The “0” parts are usually straight (forming a vertical ring).
4.3 Stick the spacer plates in place before installation. They ensure a uniform adhesive gap.
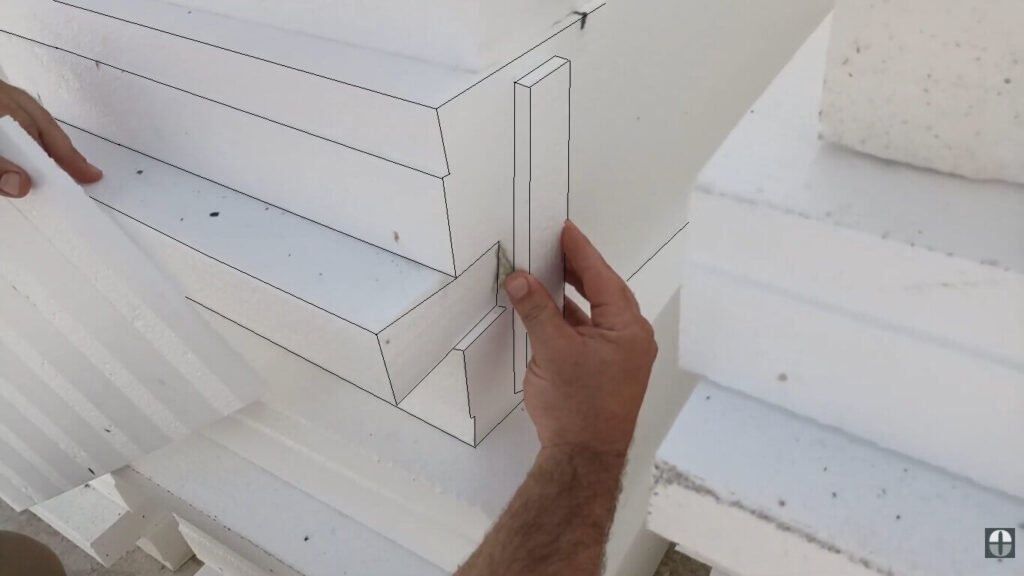
4.4 For the first ring, glue 2 plates (top and bottom) on each piece. For subsequent rings, apply 1 plate (top).
4.5 Always glue the panels on one side only. After peeling off the protective paper, the plate can be glued immediately (on a dry part).
5. Assembling the dome rings
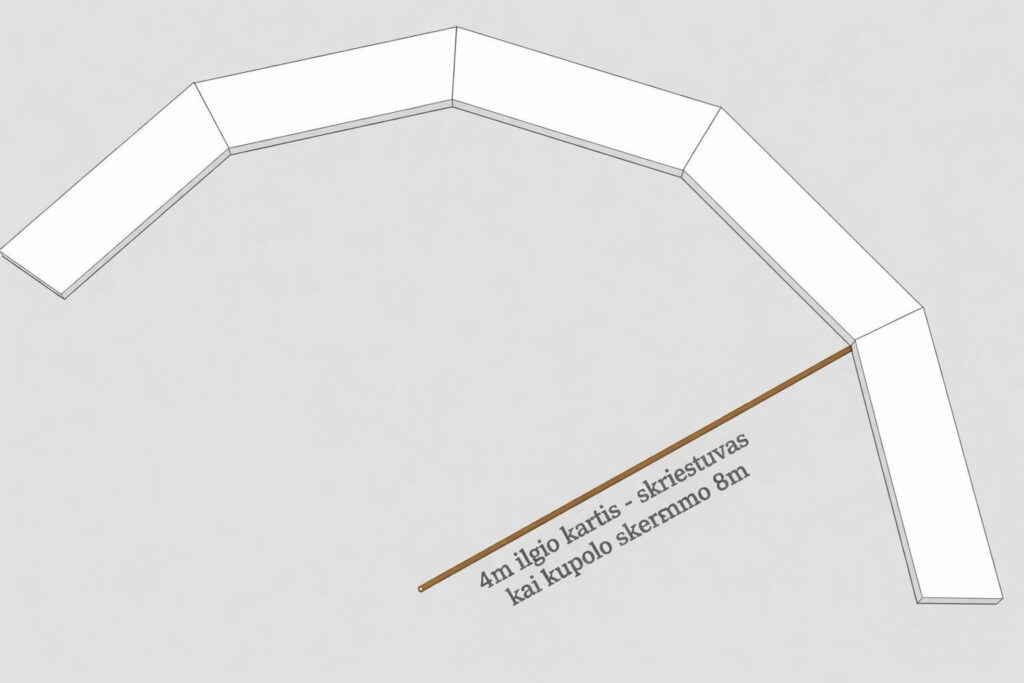
5.1 For the first ring, use a “flyer”: place each piece equidistant from the centre.
YouTube tutorial video: ‘Installation of a dome house, flat foundation’

5.2 Once the first ring is formed, tie it with straps (slings or ropes). Tighten only enough to prevent movement and deformation of the parts.

5.3 Leave a vertical clearance between the parts. This is then filled with polystyrene adhesive. (Installation foam is not suitable.). Instructional video on YouTube: “Secrets of dome formation. Instructions” .
5.4 The higher up the ring, the more the details “droop”. When assembling the ring, lift the parts that have already been put in slightly (curl the tops) with a wooden stick to make it easier to insert the new part.

5.5 Once the first ring has been fixed and the distance from the centre is the same everywhere, start blowing the polystyrene glue. When the glue has expanded and hardened, apply the next ring. It is also recommended to reinforce the other rings with straps/ropes.
5.6 Note: The dimensions of the parts may vary slightly due to the properties of the polystyrene (the joint will be looser in some places and stiffer in others).
5.7 For further work, it is advisable to cut a temporary opening for access to the interior. Preferably at the location of the future door opening.
5.8 VERY IMPORTANT: For each ring, use ALL the parts for that ring. Do NOT narrow the parts – otherwise the dome will not be neatly finished.
6. Gluing: how to fill the gap 100%
6.1 Use a glue gun (does not have to be expensive) for gluing. Without a glue gun, the dome cannot be glued properly with a glue straw.
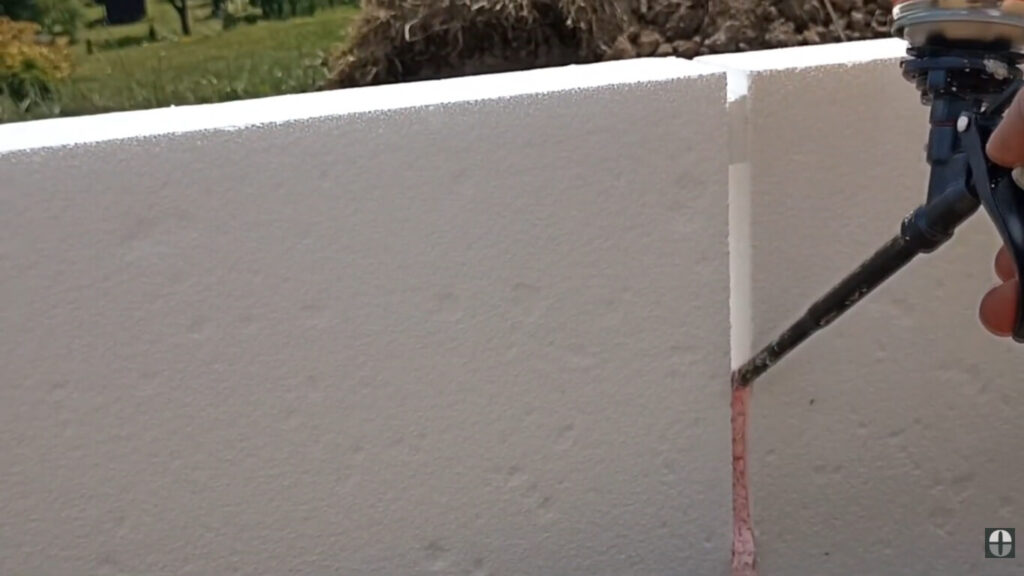
6.2 Basic principle: the technological gap must be 100% filled. This can only be achieved by a gradual filling.
6.3 The gluing of the dome may require ~50-144 (or more) glue bottles (depending on the manufacturer, dome diameter and wall thickness).
6.4 Fill in 5-8 cm layers. Blow enough to form a layer of 5-8 cm, wait until it stops expanding and stiffens, then blow another layer. It is better to fill the same space in several applications (e.g. 5-8 at a time) than many at once. YouTube tutorial video: “Dome bonding process SFEROS”.
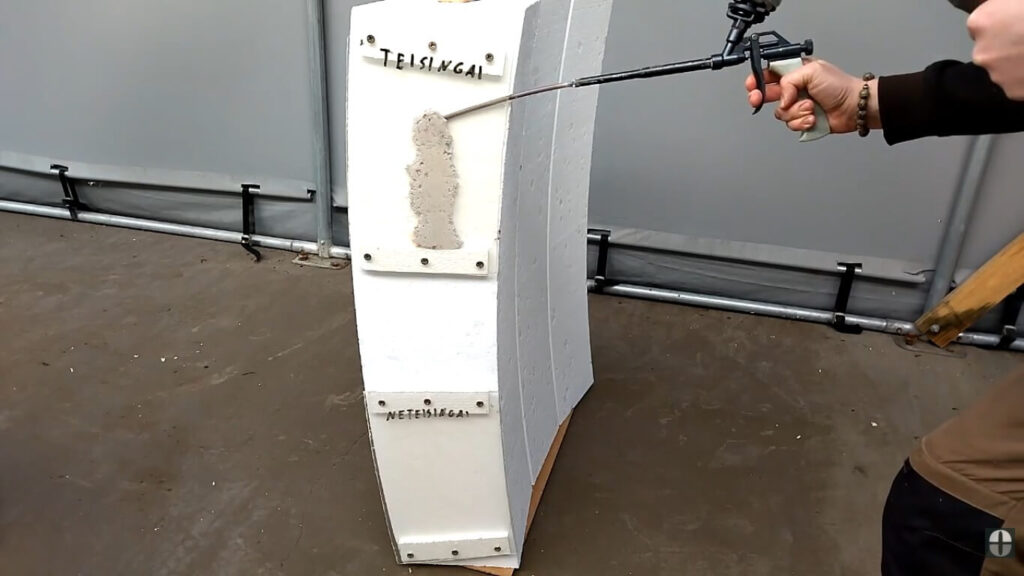
6.5 If you suspect that the adhesive may be coming out, that’s not a problem, but it is more rational not to blow too much at once.
6.6 Use a thinner straw from the glue gun (supplied) for more convenient and accurate glue blowing – this reduces movement of the parts.
6.7 Allow the glue to set completely before climbing on top of the dome. The dome may look weaker at the end, but this is normal until final setting.
6.8 If the dome is to be built on a foundation, it is recommended that the lower parts are glued to the foundation only after the dome is fully formed and glued.
6.9 The lower parts often have horizontal grooves. To fill the grooves with glue, drill a hole in the polystyrene and insert the tip of the glue gun through the hole.
6.10 Cut off any stiff, sticking-out glue with a sharp knife (a broken office knife with the blade fully extended is most convenient).
7. Door and window arches: shaping, cutting, gluing
7.1 Stick the arches on a flat surface. Use weights to clamp and lock the parts while they are being glued. It is advisable to use metal spikes (approx. 30 cm long) to pinch adjacent parts to reduce movement while the glue sets.
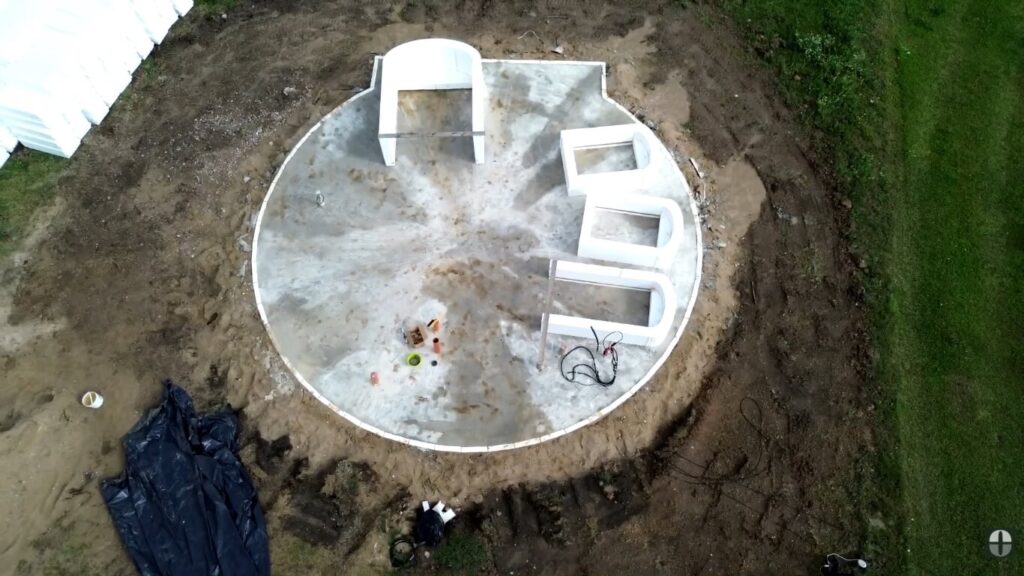
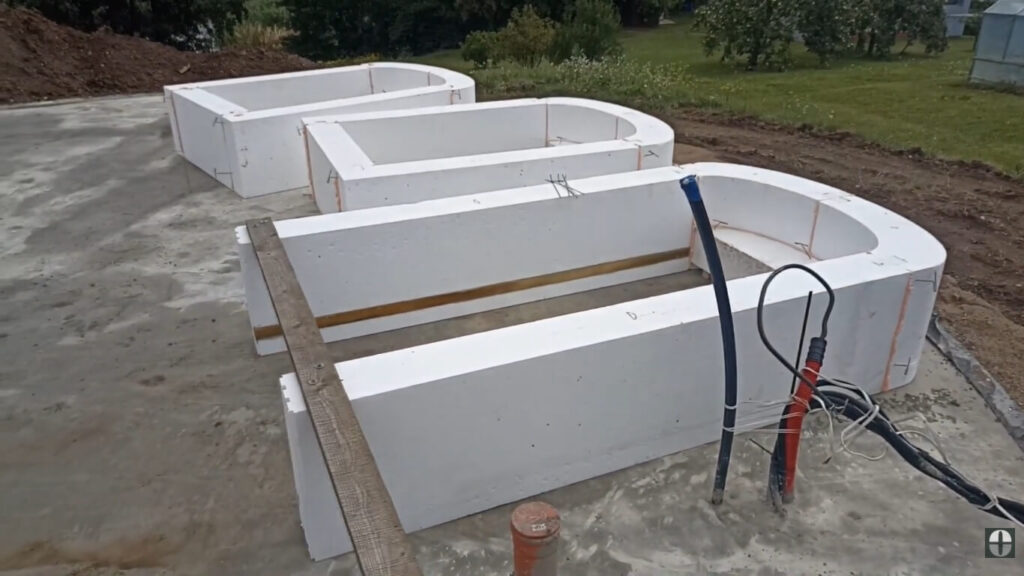
7.2 Maintain right angles – equal diagonals. This is key to the geometry of the arch.
7.3 Use a spirit level when pasting the arches. The arch must stand upright at the chosen location. YouTube tutorial video: ‘How do I glue the window and door arches of a domed house?’.
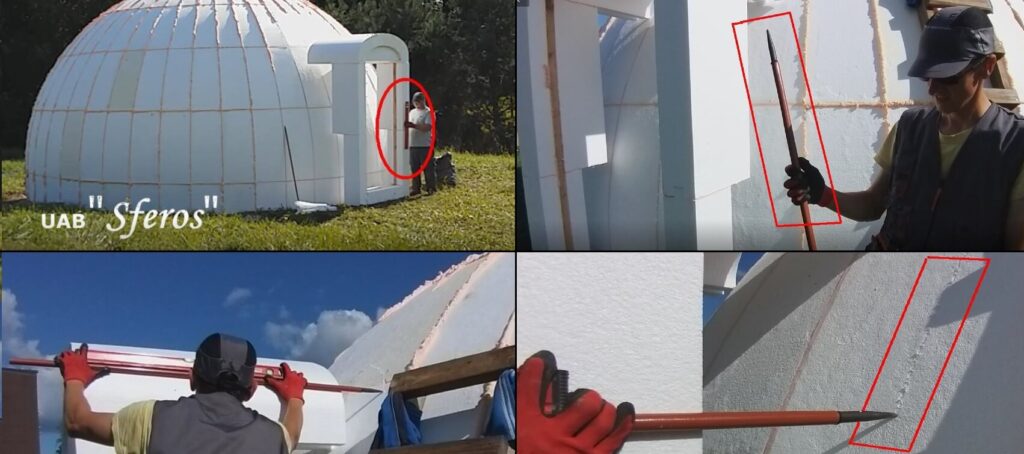
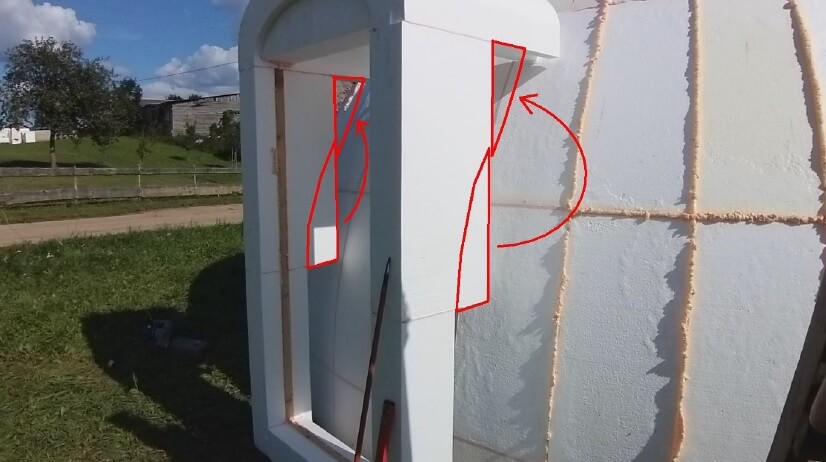
7.4 When the arch is erected, mark the cut seam of the opening. Use a straight and non-rigid cutter (wooden/metal) that slides easily over the workpiece.
7.5 Do not move the arch when drawing the seam (it can be pinned to the dome with spikes). Hold the frame horizontally. It is enough to mark the line easily; it can be highlighted with a pencil before cutting.
7.6 It is recommended to cut the hole with an electric chainsaw. Petrol can damage the polystyrene with hot exhaust fumes.
7.7 Protect the ventilation openings of the power tool from polystyrene granules: wrap with a single layer of non-stretchable cloth, shake off the granules periodically during cutting and allow the tool to cool.
7.8 When cutting, maintain as precise as possible the horizontality of the dome wall (irrespective of the cutting location).
7.9 If the opening is too small, correct it with the same saw. If it is too big, fill it with glue (for bigger gaps, fill with polystyrene insert and glue).
7.10 Once the arch has been inserted, it can be temporarily fixed by means of spikes (convenient to use welding electrodes: break off the powder coating and sharpen the end – keep an eye on it).
7.11 Fill the gaps between the arch and the dome wall in the same way as between the parts: gradually, allowing the glue to expand and set.
7.12 The arch is designed in such a way that the cut elements are reusable once aligned with the inner wall of the dome: turn the cut element over and glue it into the missing position.
8. Adhesive curing conditions
8.1 The setting of adhesives is accelerated by wet weather (e.g. rain).
8.2 If the weather is very dry and the sun is scorching, moisten the inflated adhesive with clean water (using a gardener’s sprayer).
9. Windows, doors, skylights
9.1 Glue a 50×50 mm wooden board in the door and window openings. Glue with the same polystyrene glue using a glue gun.
9.2 Fix windows and doors with screws to the timber joists.
9.3 Skylights are installed in a similar way to windows: prepare a recess and stick the skylight into it.
10. Removing unevenness
10.1 Use a sharp knife to remove unevenness and stiff adhesive.
10.2 Use a polystyrene grater or an electric sander with a vibrating pad for additional levelling.
10.3 Note: The angle grinder can easily cause more unevenness, so it is better not to use it.
11. Reinforcement and finishing
11.1 After the preparation of the dome, the external and internal surfaces shall be reinforced in the same way as buildings insulated with polystyrene foam: cementitious reinforcing compound + facade glass fabric mesh.
11.2 Installation and sealing of windows/doors – as in conventional buildings: self-tapping into the timber joist via a mounting pad and sealed with normal foam.
12. Engineering inside the dome
12.1 For fixing the luminaires, cut a groove and glue in a wooden dowel before reinforcement. Mark the location so that it is easy to find after finishing.
12.2 After interior finishing, a spiral plug for screwing into polystyrene may be used for hanging luminaires.
12.3 For electrical cables: cut the grooves (before reinforcement), insert the cables in the corrugations and seal with polystyrene glue foam.
13. Flooring
13.1 The floor is installed as in normal construction: on compacted gravel – EPS100 thermal insulation (10-30 cm), foil, reinforcement mesh, concrete (“stack”) 7-20 cm (depending on the size of the dome and/or the design).
13.2 Where underfloor heating is planned, pipes or electrical cables shall be installed in the concrete; in this case, the concrete layer shall be suitable.
14. Perdanga
14.1 The overlay shall not be installed in the dome structure. The floor of the second floor (first floor ceiling) shall be a separate system supported by columns, first floor walls, etc. The dome walls are not designed to support the weight of the slab.
15. Internal partitions and supports
15.1 Internal partitions may be constructed of timber or metal framing (plasterboard, paneling, soundproofing), or masonry walls.
15.2 Assess the weight of the structures. If columns are to be constructed, provide a reliable support point for each column (drilled piles with reinforcement) or provide additional reinforcement in the concrete layer.
15.3 In the case of masonry partitions, it is recommended to prepare a “footing” under the masonry walls or to provide additional reinforcement in the concrete layer.
15.4 If the partitions are made of sheet profiles: attach the frame to the dome via glued wooden pegs (same principle as for fixing luminaires). No foundation is required – the frame can be mounted on a “stack”.
15.5 If underfloor heating is installed, protect the heating elements in the concrete by drilling holes in the anchors.
16. Additional elements after finishing
16.1 Even after a long period of time, an additional window or door can be installed, as the dome structure is monolithic and does not have separate load-bearing elements as in a framed building.
16.2 Very important: only carry out such work after consulting a Sferos UAB representative, as this is a condition for the validity of the warranty.
17. Materials, standards, operation and warranty
17.1 Use only certified materials and in accordance with the intended use. If non-certified or unsuitable materials are used, Sferos UAB does not guarantee the stability and durability of the building.
17.2 Comply with all construction requirements and regulations during construction.
17.3 Remove any defects (scratches, tears, cracks, etc.) observed during operation immediately to prevent loss of stability and durability. Repair defects in accordance with the building laws of the Republic of Lithuania, using only certified materials and under appropriate conditions.
Annex A. General construction requirements (applicable when the following works are carried out)
A.1 Earthworks: trenching. All excavations shall be reinforced (wooden structures or metal shields, depending on the depth of the excavation). Work areas shall be fenced off and warning signs erected.
A.2 Backfilling: use the soil specified in the design (if available) for backfilling. Do not use primers with organic impurities or dissolving salts. Apply in layers, fully compacted to k=0.95, layer thickness 250-600 mm (depending on the soil and mechanism).
A.3 Installation of foundations: works using gravel, sandy soil and crushed stone. Inside the building, a 200 mm layer of gravel is poured under the floor and compacted to k=0.95.
A.4 Concrete works: the concrete composition is chosen according to the requirements (strength, water and frost resistance).
A.5 Fixtures and fittings: use only new materials. Arrangement of fixtures and fittings – by design. Anchor bolts and inserts shall be anchored prior to concrete placement.
A.6 Concrete mix placement: the mix is placed on the prepared substrate in tested and reinforced formwork; reinforcement, embedments, fixings are checked. Vibration is carried out in accordance with the standards.
A.7 Safety in concrete work: check scaffolding, decking, handrails; do not work with reinforcement near live wires; ground welding equipment; disconnect the current when rebuilding concrete equipment.
A.8 Fasteners: metal products – with corrosion protection. If black metal is used – clean off rust and protect (painting/galvanising).
A.9 Wood: wooden elements shall be painted with fire-antiseptic paint. End of timber in contact with concrete/masonry – silicone mastic applied; contact surfaces to be wrapped with roller waterproofing.
A.10 Insulation: insulation materials must be non-toxic and comply with fire safety requirements; external construction and roof solutions must be approved by the Fire Department of the Republic of Lithuania.
A.11 Waterproofing of floors on soil: single-layer rolls; in case of high water table, bonded with 100 mm overlaps on dry, level surfaces.
A.12 Wet room insulation: 2 layers of roller covering on bituminous mastic or adhesive coating; overlaps of 100 mm; each layer to be laid after the preceding underlay has cured.
18. Support and contacts
18.1 In case of any uncertainties during the construction process, it is recommended to contact a representative of UAB Sferos (https://sferos.lt/).
18.2 Last modified: 10/02/2026.
Contact:
Manager
Mob.: +370 670 74709
Email: [email protected]
Production Manager
Mob.: +370 641 76609
Email: [email protected]
Website: https://sferos.lt/
Sferos, UAB | Company code 304645503 | Pušų g. 7, Trūdai, LT-18225, Švenčionių r.
